Air RB - Performance Guide - User guide & Main Page:
Air RB - Performance Guide - User guide & Main Page - Game Discussion / Realistic
Flight Stick Setup Guide:
Flight Stick Setup Guide: - Game Discussion / Realistic Battle - War Thunder — official forum
In war thunder the setting up a dedicated throttle can be a challenge its been broken for years and has yet to be fixed. The main issue is the throttle axis when bound will go past 100% and trigger WEP no matter what. Adjusting the sliders to lower the throttle will alleviate the issue can be tricky and instead trigger the brakes at all times which is also not ideal.
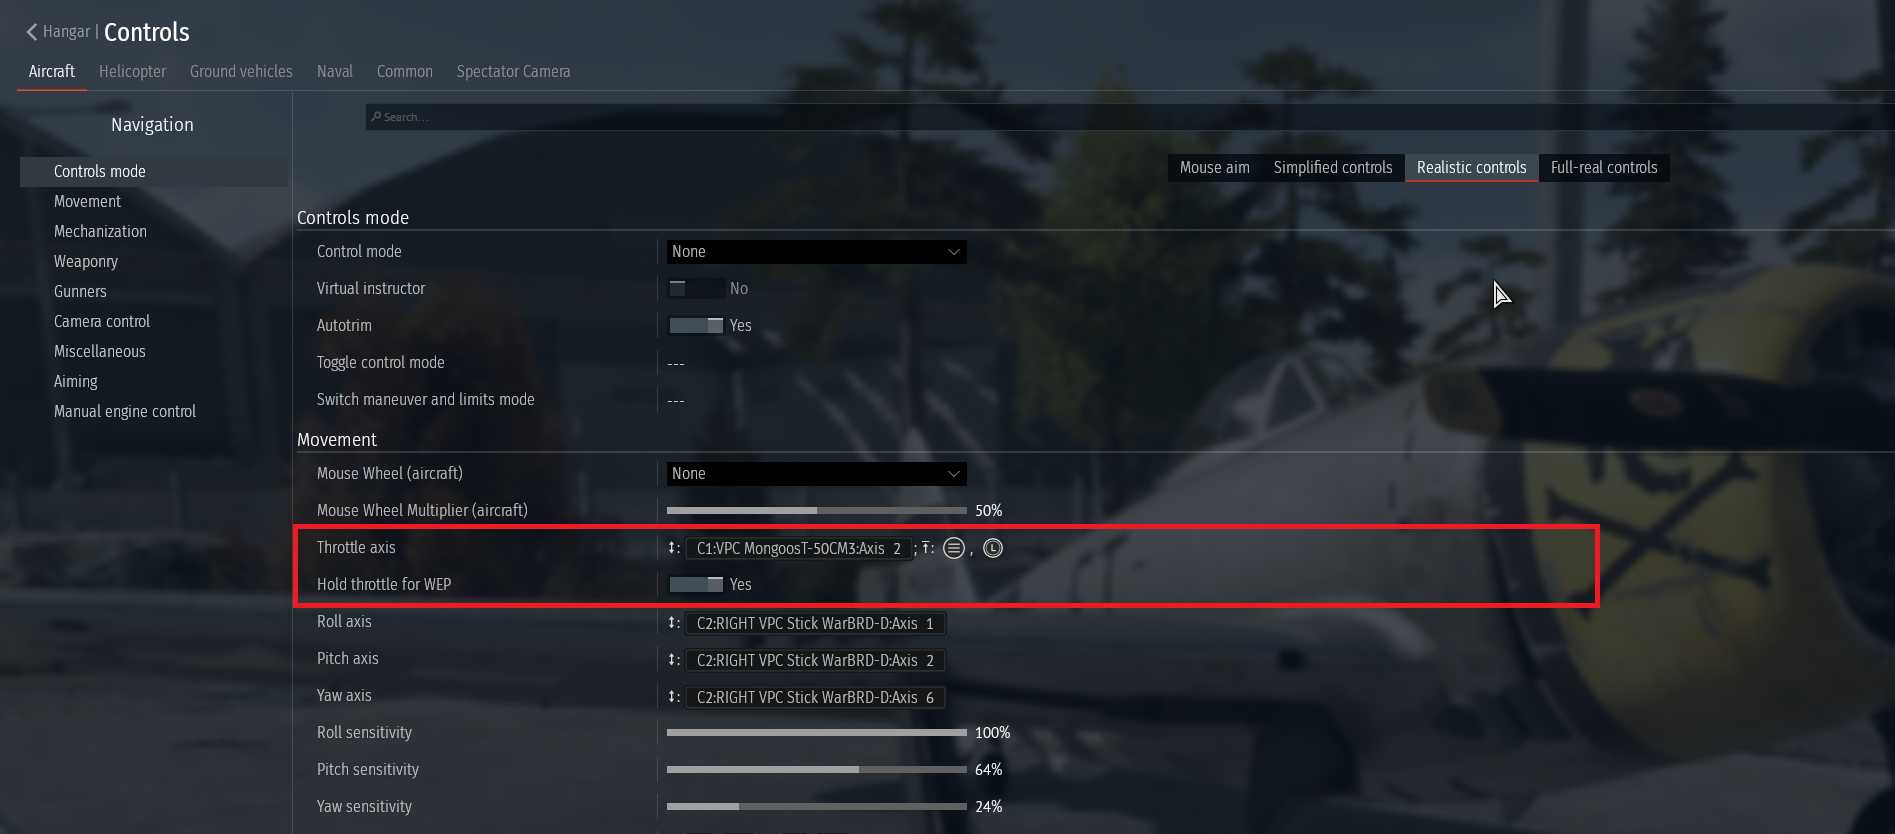
Step 1:
To get a 0-100% throttle with a seperate WEP button follow the following steps Select “Hold throttle for WEP” and switch to “Yes” like in the box below, then click on throttle axis for the next step.
Figure 1:
Step 2:
After enabling “Hold throttle for WEP” and clicking on “Throttle axis” you should see this picture below. If you havent already, click on “Autodetect axis” at the top center of the screen, and simply move your throttle axis to bind it.
Figure 2:

Step 3:
“Maximum Value” at the top will be your WEP button. Select and bind what you want this to be. Enter the values you see in the picture above and when you are done you should have a working 0-100% throttle with separate WEP button. If your throttle function is upside down switch “Invert Axis” to Yes.
one issue to be aware of is if you invert the axis to yes, it will also invert the maximum value and minimum value. So if you set maximum value to a button for WEP but then invert the axis your WEP button will now drop your throttle to 0%. The solution is thankfully simple for this issue, just remap the Button for WEP to Minimum value and you will have your WEP working with an inverted axis.
With the above two issues resolved we can now focus on quality of life improvements such as a WEP toggle button. A WEP toggle button will make it so you can push the WEP button once and it will WEP until you push it again and it will release WEP. It’s especially nice for planes that have Infi-WEP capability so you dont have to physically hold it down the whole time.
Step 4:
Setting up a WEP button hold toggle:
Depending on what hardware you have there are a few options for setting up a WEP toggle button. I will be covering Virpil, VKB and Thrustmaster devices.
Virpil Devices (Figure 3):
*In the Virpil Software find the button you have mapped for WEP by pressing it, it should light up.
*Go to the right hand side and change the value highlighted in the picture below to “Toggle”.
*Save the changes and you now have a WEP toggle button.
Figure 3:

VKB Devices (Figure 4):
*Run VKBDevCfg as Admin and navigate to Profile/Buttons/Physical Layer.
*Check the poll box on the right side of the chart, actuate the button on your joystick, then click on the red flashing cell on the chart.
*Set it up a ButAlt, send the DefState to Off (if you want to be off by default),
*close the window, press the Set button, done.
Figure 4:

Thrustmaster (Figure 5, 6 & 7):
The thrust master software is pretty straight forward but there are a few things to remember while setting up a toggle in the T.A.R.G.E.T software. Open the user manual and follow the directions but pay special attention to the following since they can be areas that get tricky.
*Follow the directions in (Figure 5) make sure you check the sequence box so you can add a release.
*The term you want to use is under type is " Press ". This is now your WEP toggle activate button shown below in (Figure 6)
*The term you want to use is under type is " Release ". This is now your WEP toggle Release button shown below in (Figure 7)
*This should get you a WEP toggle button working in game.
Figure 5:

Figure 6:

Figure 7:
