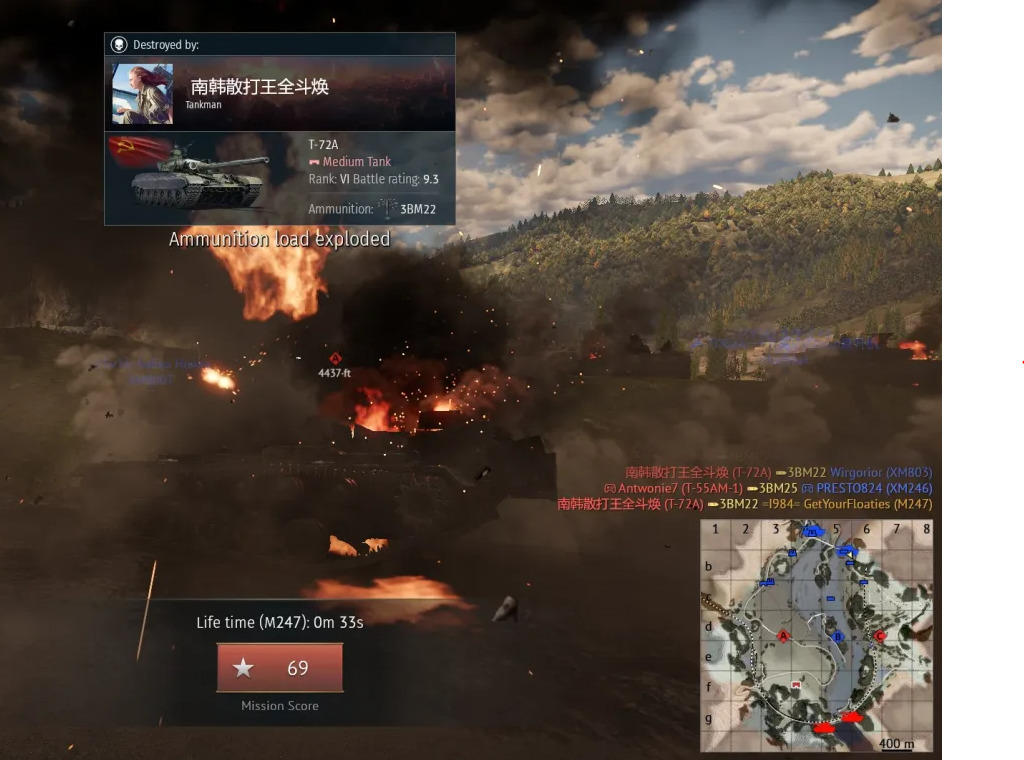
The map is absolute crap. You can shoot into the north spawn far too easily from A, and the same for south spawn from C. And both spawns can shoot into each other the second the game starts. Seeing how spawn camping is already an every game thing now, theres no need to have maps that let you shoot into spawn from across the map. (The person who killed me was past A)
2 Likes
Never mind, good luck 😉
2 Likes
This map reminds me of the one World of Tanks map with the ravine in the middle.
Obviously this is a 1.8x1.8km map, and feels a lot larger.
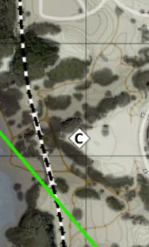
You can spawn North East spawn, but you have to avoid the main road, unless they changed the dip on the “left” of the road since I last went to C.
1 Like
Have you tried to not leave the map on the elevated roads that expose you to the whole map (and the enemy spawn as you already noticed?) you can easily just drop off the road to your left and just move onto the exact middle of the map (especially at match start) on the right routes completely covered. That also counts for your other spawn. Leaving the spawn and then just sitting on the first exposed hill like the two dead guys in front of you is not the way to go at brs with pin pont accurate darts that travel 1600 m/s and laserrangefinders. though yes, there are some critical areas like the one where you got shot at, but if you spawn again you just gotta be aware theres people having set their sights on that area, which really is a bit unbalanced because it makes leaving this spawn much harder than any of the enemies ones, which are only exposed for like a second or two towards your team’s spawns in this case).
Either not spawn there at all (as second spawn, first is completely fine if you dont waste like 60 seconds mging teammates before leaving spawn), go very careful as far as you can in the ditch on the left of the road, or smoke it off and move. But yeah, the snail should really do some minor adjustments to critical areas like this one which go heavily in favour of one team. on the other hand once you managed to take c you can completely shut off their whole spawn sitting tank down and waiting for someone move too careless from the hill southeast of c on your map…
Point being it just takes quite a lot of matches played at critical BRs to learn the maps, learn where good and relatively safe power positions are, where you can shoot from there and from where you can get taken out and where you can and should move once the enemy team holds certain positions. But ofc you can sometimes still get caught out, happens to everyone. The map is quite nice apart from minor adjusmtents like this one needed and the usual bowl which makes popping up and behind mountainranges too easy for cas to completely avoid spaa (leaving them too little time to react to planes or helis that can pop up basically in 360° around you and go back behind cover before your missile gets anywhere close)
EDIT: sry that this might be a bit confusing i typed half this frikking article thinking you spawned in your other spawn before realizing it was the other one, but it still somewaht counts for this position, though there should be some adjusmtents to not force you to drive in the open there for like 5 seconds, maybe at least an hulldown option on the left side of the road would be better to equal the odds for both teams.
4 Likes
its certainly one of my most liked too as the terrain with a few tweaks would have some of the best variety for medium-long range fighting while also being a cool one for CAS pilots as its a big bowl of death from SPAA but still has lots of lines where you can be safe
Those sniping lines are my main problem with the map tbh, Spawn sniping is inherently bad and the south side doesn’t have any equal spots for doing the same to the north team.
clean spawn safety up a bit, make the area around C more useful (honestly adding another capture point would probably do it) and its the best map gaijin has ever made in my opinion
8 Likes
You mean the south side on the map you quoted? If you spawn on the left spawn you can move into numerous sniping spots on the hill totally covered and block a safe exit on northern teams eastern spawn completely (exactly where op died) Theres also a spot you can go as south team after immediately dropping down and if you win the eventual brawl capping b then move along the road towards a and theres a small hill you can sit behind where you can shoot into the western spawn exit and if you can expose yourself to their western spawn also into the eastern one.
If anything, is it not the other way around? Southern team is only exposed like 2 or 3 seconds between the train and that valley (nothing you cant smoke off before going onto the road into the valley), well but then you have the hill in front of you where an enemy with good gun depression can pop up anywhere and you have problems for safe paths towards b in mid/lategame. Norhern teams spawns are mostly just completely open (with still safe routes out behind the roads, except for eastern spawn)
2 Likes
that spot itself is countered by my preferred position near the C point above the railway. Easily countersnipe people from there while controlling that cap point, dont need to move far to defend B point either.
I play this general area whenever i have a tank with a LRF as i can lock down the north spawns really easily while saying quite hidden. when im playing from the north the south right spawn becomes impossible to leave as i cover the dam and their railway path fully. Its such a busted spot to hold with a squad as nobody can spawn and you own two cap points.
If i dont have a LRF i play the left side and do medium range brawling for A (and B if the A point is on the railway bridge)
1 Like
True the sniping spot into c is very good and the one south of c into the valley is straight up a bit too strong. One or two tanks there can hold the whole enemy team (except if youre in a russian tank, 5° gun depress say hi)
But actually the spot im describing sort of counter or at least control the sniping spot you mentioned EDIT: Just realized youre speaking of the one on the traintracks just after the tunnel?. If you set up correctly you cant get shot there (though you might get noticed) But sitting there you can peek that hill up north of c hull down, and to shoot back lots of tanks have to expose their hulls (russian tanks have to drive completely in the open) and they still only can shoot you there if you peak them. you can still shoot into their western spawn completely covered towards that sniping hill. (but youll have trouble leaving again towards b tbf)
My cheiftain mk10 says hello with an L23 dart.
The spot you mention can be a little hairy for me when i dont play my cards right, but having good gun depression tends to mean i wont be exposed for long. does help when you hold close to the cliffs as no CAS player can spot you
Yeah its a pretty small area you can move on, but its pretty powerful :-) Problem is your only semi safe exit is back down towards b and on the approach or descent you are very vulnerable towards those sniping hills for like 10-15 seconds. but you can cheeky binoscout the sniping hill north of c and peek when its safe and control both enemy spawns in the north.
1 Like
jumping down to B can be risky but most people are too busy looking in on the bunfight for A cap to worry about the sniper near C creeping up on them
Yeah, thats what a lot of people underestimate i feel like. Yes some spots are very powerful. But they often have a very dangerous access, very limited space and once people actually communicate, ping you or even worse scout you, youre doomed because it gets very risky to peek and you cant leave. Then youre stuck until you get casd. Im really watching tons of videos of insanely good players and what really lots and lots of them seem to be doing right effortlessly without thinking too much about it is, even if they made it into a crazy strong position, they dont just “overstay their welcome there” they take the risk of pushing out of there just to not get stuck.
So, everone here just proved my point.
When you dont get spawn sniped I like the map. But thats only once in every 30 times you get the map.
You shouldnt have to do all this crap just to be able to not get sniped in spawn. The fact spawn sniping is even possible is the problem.
From the right red spawn, you can see the dam on the blue side. There are clear lines from spawn to spawn.
provided you can get to a good spot and your team doesnt fold in the first 45 seconds its usually ok.
Only issue is that unless youre in a squad you cant rely on a team at all
i explained in a way too long article how it is possible to leave the northern sides western spawn completely covered while admitting that, yes, for everything but first spawn the eastern spawn is a bit problematic? Dont drive on the roads but behind it from western spawn. You can get to around the middle of the map completely covered. Theres tons of maps in wt where you drive 500 m to the middle of the map and can shoot from hulldown positions into the whole enemy spawn that has 0 cover?
2 Likes
And it shouldnt be like that. You’re already guaranteed to be spawn camped every game, no need to make it possible to shoot spawn to spawn or into spawns across the map.
No, we all told you that you are playing the map wrong. I posted a TON of information and guides on how not to commit suicide the moment you spawn in. It is EASY to get out of spawn from both north or south team. Look at what I posted. You have the info. Now you only have to utilize it.
Again, no. I proved that 100% wrong. Did you look at all the screenshots and information I posted?
1 Like