- Yes
- No
HI EVERYBODY!
Today i want to suggest to you all a map that is particularly close to my heart for various reason. Before introducing all the details and infos, a quick reminder:
Getting information on this map was extremely hard so there will be some parts of the topic where i speculate. Sadly the current state of the geographical region where this battle was fought has completely been changed and there’s a serious scarcity of photos available online, so if anyone can help enrich this suggestion (if you’re a Kuwaiti or if you simply have more info than me) i would definitely love it!
Without further to do, here’s the
HISTORY OF THE BATTLE (it's long so it's a spoiler)
It’s the 2nd of August 1990, Iraq just invaded Kuwait by surprise. The Kuwaiti Armed Forces, that were already inferior compared to the numbers of the seasoned Iraqi Army, fought with very little resistance inside the major urban centres. 12 hours after the invasion, the Capital and basically 75% of the country was under Iraqi Occupation (all the Eastern Part) and the Invading Force is starting to advance towards the Western Border between Kuwait and Saudi Arabia.
In a desperate attempt to block the advance, the 35th Brigade of the Kuwait Army departed from their Base at 0600 with ca. 36 Chieftain Mk. 5s and a number of IFVs and 2S1.
They reached the Cloverleaf Junction between H-70 and H-6 (H stands for Highway) at 0645 and ambushed the 1st “Hammurabi” Iraqi Division that was advancing from H-80/H-6 towards Kuwait City to reinforce the flank. Said division suffered heavy casualties due to the fact that the Chieftains quickly destroyed the head and the tail of the convoy, making any Iraqi retreat impossible.
To help the attack, the 2S1s of the 35th stationed just South of the Al-Salem AB provided indirect fire, as well as an A-4KU (an A-4M of the Kuwaiti Air Force) providing Air Support.
At 1100 the 35th Brigade was notified that the 2nd “Medina” Armored Division was intercepting the 1st Division alongside H-70, so they were basically being flanked. Incredibly, the lack of communication made the 2nd Division to literally pass the 2S1s and the 35th Brigade without noting the absolute mayhem of the zone. After some heavy fire, the remainder of the 1st and the 2nd Divisions flee towards a gas station located West of the Junction (alongside H-70), where they regrouped and decided to launch an offensive.
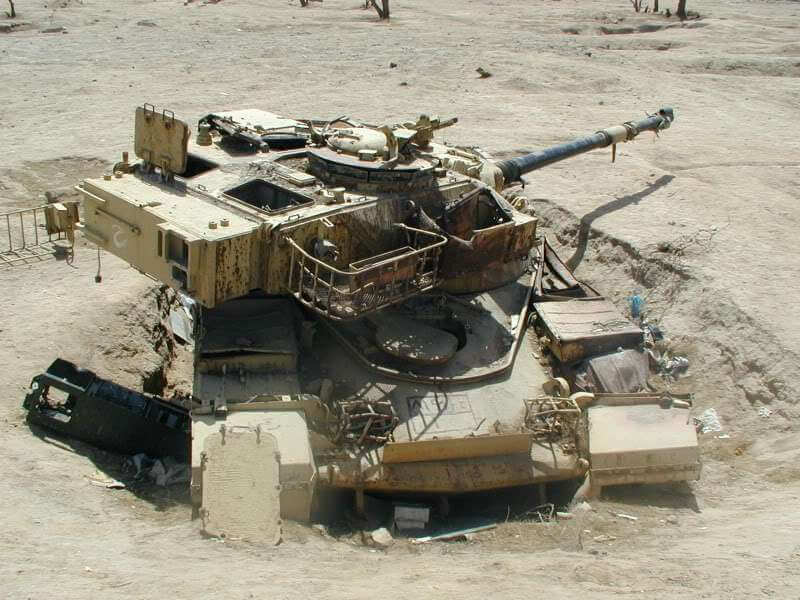
The 35th Brigade, having almost no ammo, decided to retreat South towards Saudi Arabia where they arrived at around 1630. The Kuwaitis suffered minor losses (2 tanks lost,3-4 IFVs lost, the A-4KU damaged but escaped to Saudi Arabia and sadly all personnel inside the Al-Salem AB was executed) compared to an estimate loss of over 30 Iraqi tanks, some of them were even T-72s.
The first picture here shows the tactical map of the battle

Meanwhile this second picture shows the approximate current view

As you can see, the total approximate area of the map would be equal to ca. 190 Km² which is obviously too much for any War Thunder map ever conceived, but luckily the map can be scaled down pretty efficiently.
There are a lot of interesting parts on this map that, united, form maybe the best all-around map in the game, so let’s go over every single one.

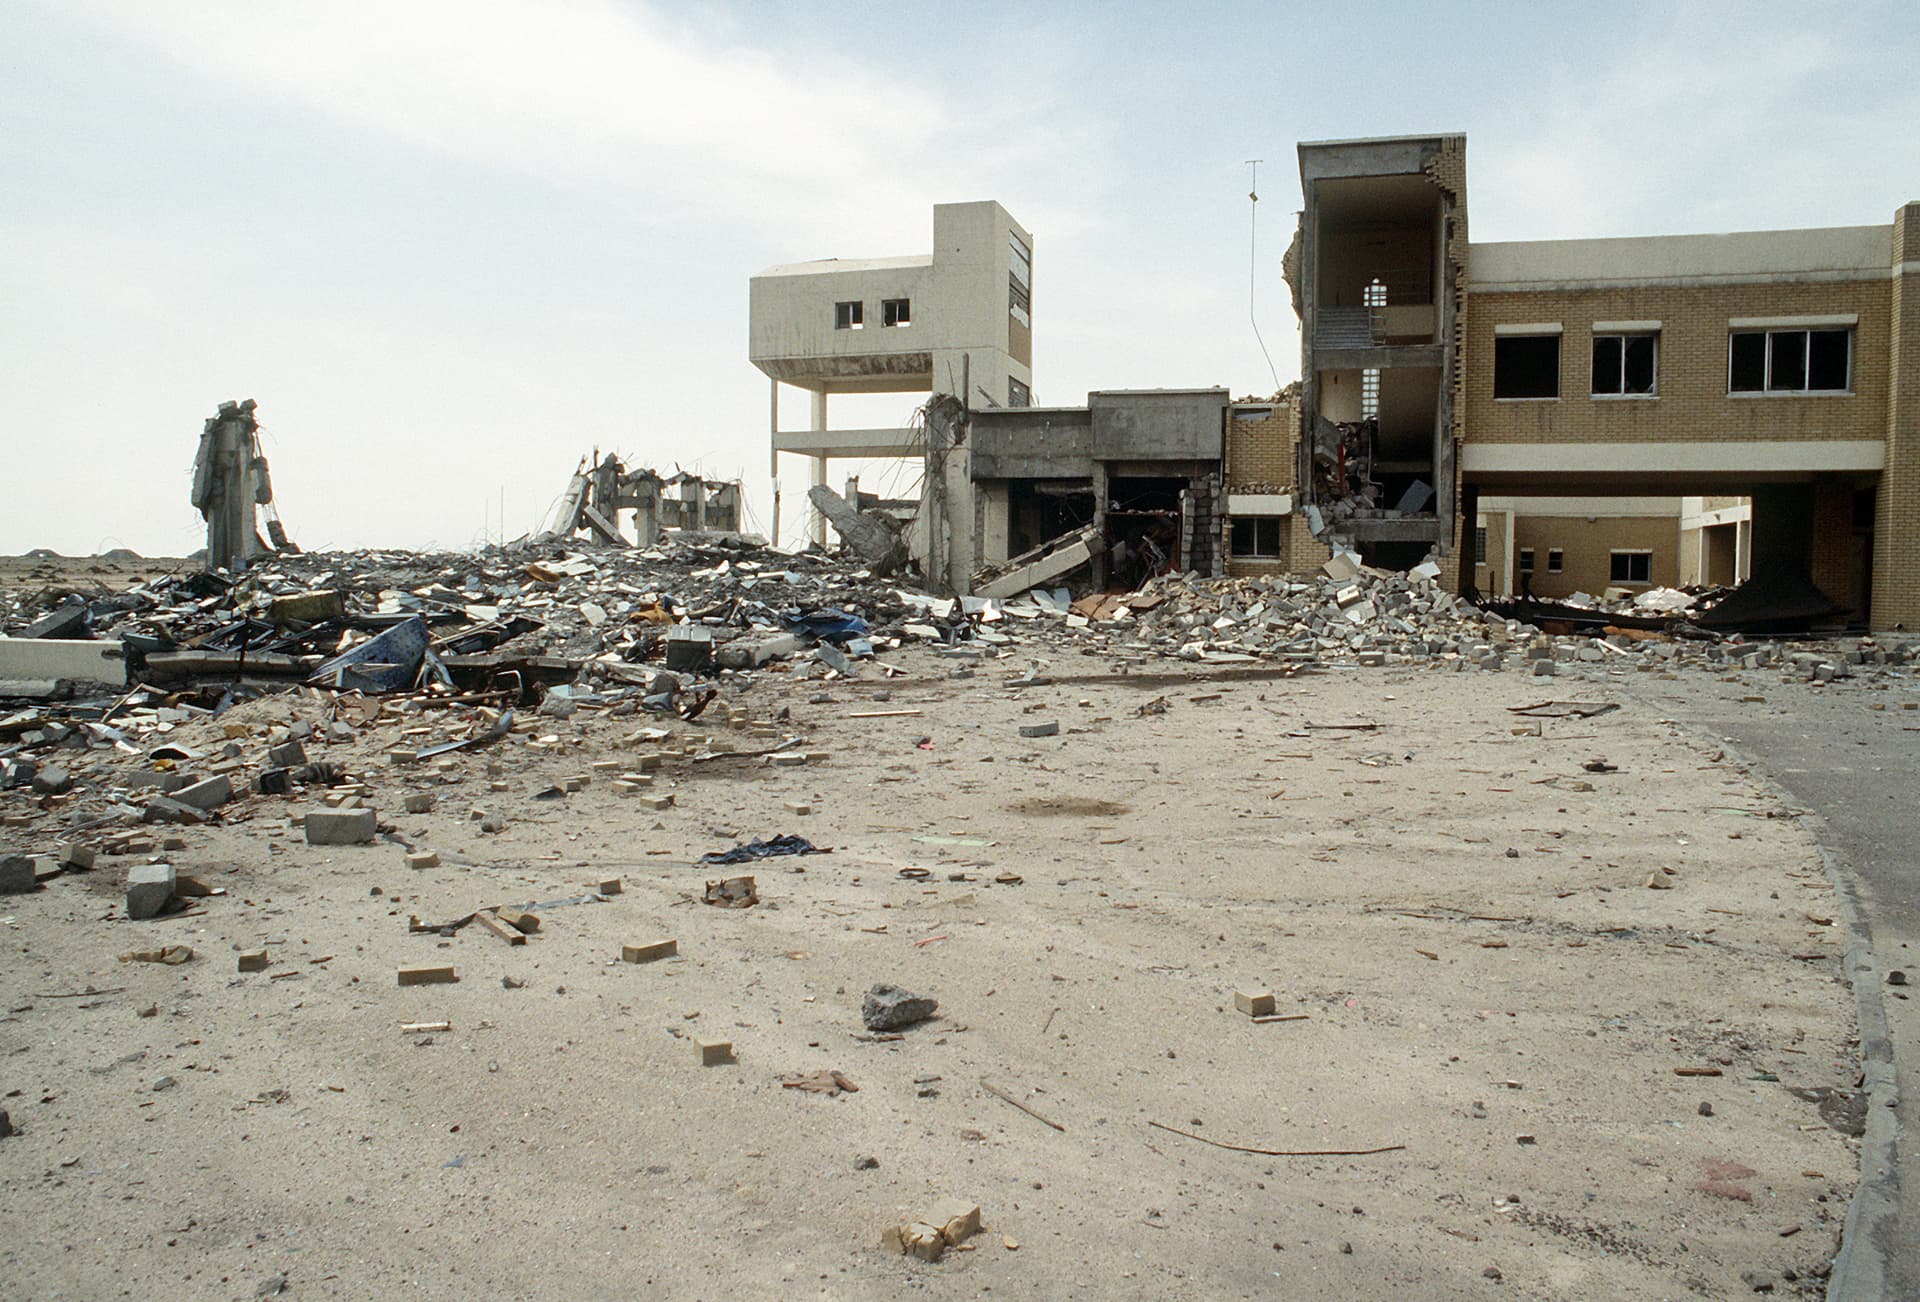
- THE AIR BASE
First one let’s talk about the Air Base. Sadly there are no available photos of it before the Invasion, but i’ll put the aftermath photos in a spoiler section so you can see how the reinforced hangars should look like. Essentially a classical Air Base, with buildings that can act as a cover and a large, open and flat area. Perfect for a mixed combat and to use the flat and paved surface to reach either Zone 2 in the East or Zone 2 in the South.


-
THE DESERT
The second zone here is the desert, that you can find either on the Southern Part of the map or in the Northern Region. It’s just your classical desert with dunes and whatnot. Interestingly, the Northern part is divided by a Ridge that ends on the Southern part (said Ridge is of unknown height). So Basically here you’ll have most of your long-range sniping gameplay with both fronts having also access to a safe passageway to Zone 3 (if you don’t want to take the roads that are high risk high reward) -
THE CITY
As always, finding images of the old Al-Jahra is extremely hard, the only picture i was able to find is this one that is sadly dated to 1961. Further research here is required since i really don’t know how it would look like in 1990 (although i think the architecture would be identical to the one used in Kuwait City during the same time)

Here we would have the main CQC fight, You can access the city either on the South-West or on the North-East side of Zone 2 or by using the roads that then intercept Zone 4 -
THE JUNCTIONS
This map has 2 Junctions: the main one, in which most of the battle was consumed, is located basically at the centerpoint of the map and has a cemetery located just North of it (photos unknown). The other one is located North on the map. These Junctions are elevated, meaning you have a “high risk,high reward” scenario in which you can access most of the battle but at the cost of being exposed.
Here below is an example of how a Conquest, Domination and Battle matches can look like


As mentioned, this posts contain a lot of empty spaces and i would love to collaborate with someone that can fill those spaces and make this suggestion even richer. I think this map will be liked by everyone in the community since it offers basically any type of combat available into this game. Furthermore, it is a homage to a war long forgotten but still lives inside this game thanks to decals, camos, vehicles and even trailers. Hope you all liked this suggestion and let me know of anything, see you on the battlefield!
