Not really what I meant. When I said “Take Down”, I meant disable. Some call it the DIE protocol. Disable, Immobilize, Eliminate. If you’re not someone with my kind of hours, that’s all you really can do. I don’t expect someone coming to the forums for advice to be on my level, so I’ll just tell them a simpler way to survive the engagement. It would be sadistic to suggest they need to pixel snipe its belts with darts as I do.
My suggestion is that If you blow up the turret belts with HE, the vehicle cannot engage you properly. Once it can’t engage you back, you can find a way to kill it.
I’m by no means calling it balanced. I’ve been stating it shouldn’t have been lower than 11.3 since I saw it on the Dev Server.
Ask the chinese…they seem to have the miracle shots that 1 shot 100% of every tank from any direction and any distance. All of us normal people need more then 1 shot most times…guess we need to go to the 50 a week option they are using
Learn to shoot the ammo, especially on the techtree bmpt (or any tank without blow-out panels for that matter).
If you observe your shot in the video, you can see that it was a volumetric hit, since it penned the very edge of the engine deck, went outside and obliterated itself (as it should be expected).
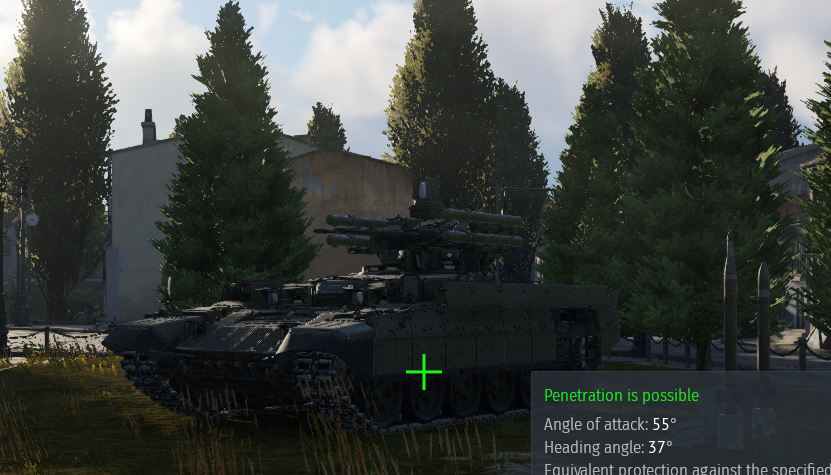
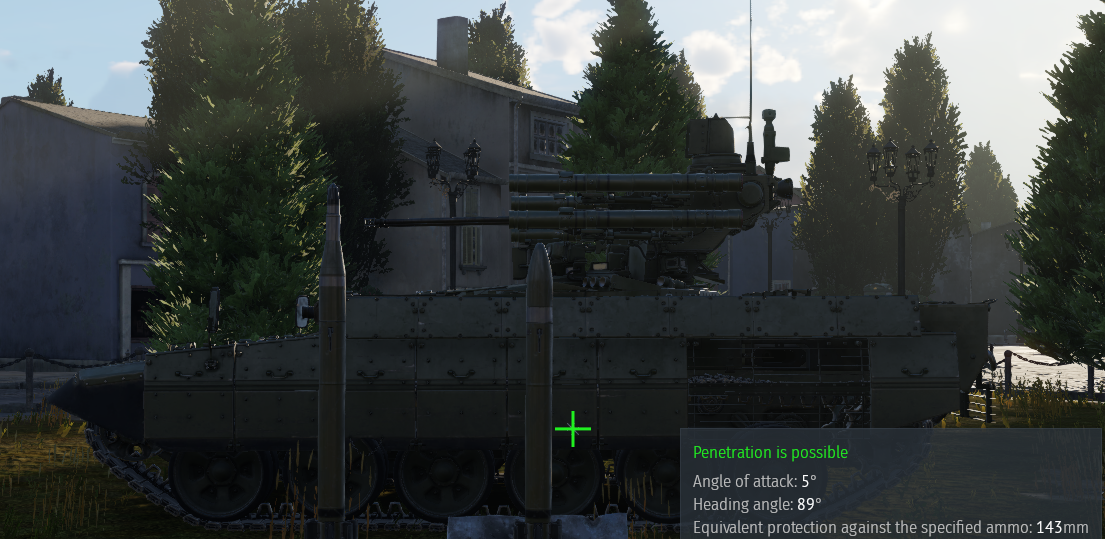
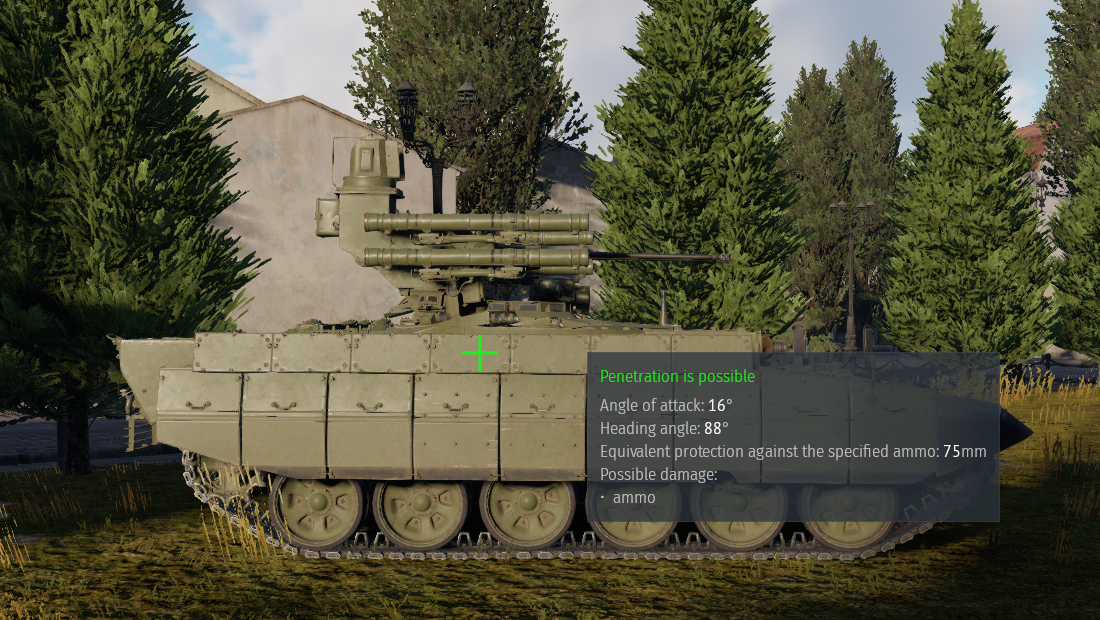
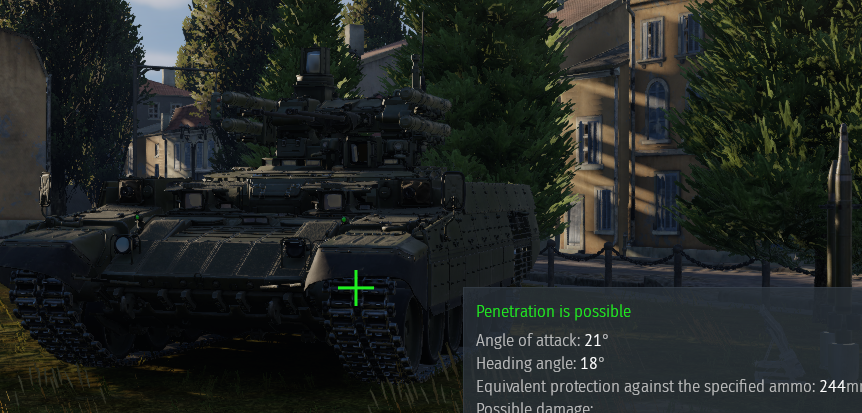
I recommend shooting the top of the lower plate from the front if you can hit the ammo (NOT into the fuel tanks), shooting the front of the track if you see it semi-angled, since it’s pretty much always gonna destroy the ammo, and from side-aspect shoot the ammo, best if you shoot below the ERA since they can deflect apfsds and make them non-pen.
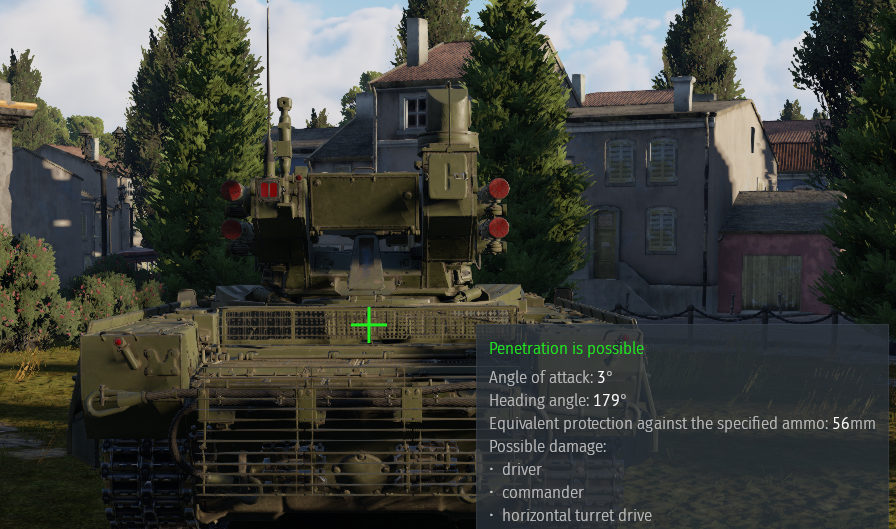
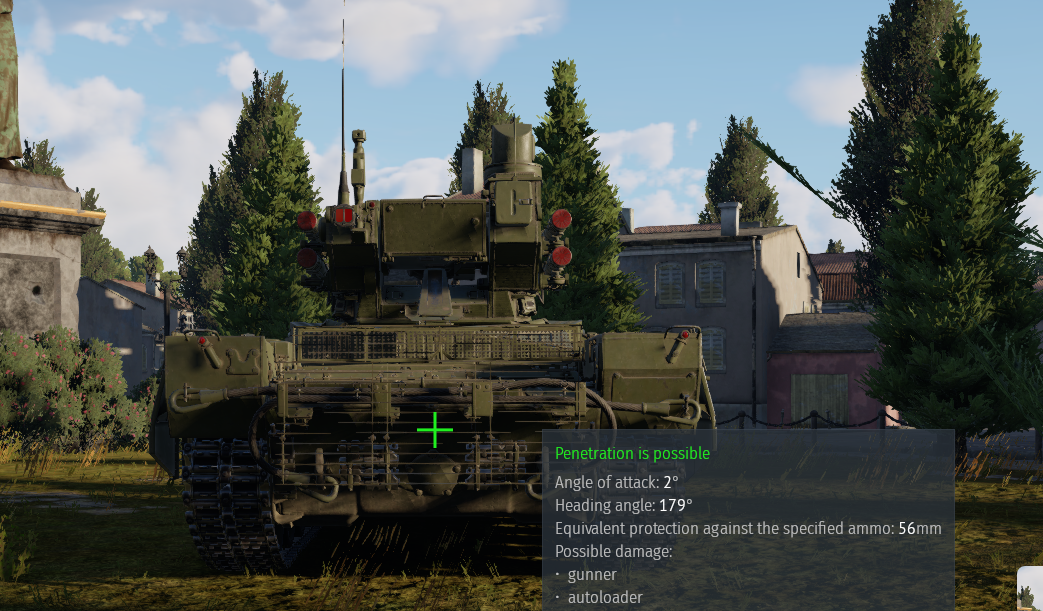
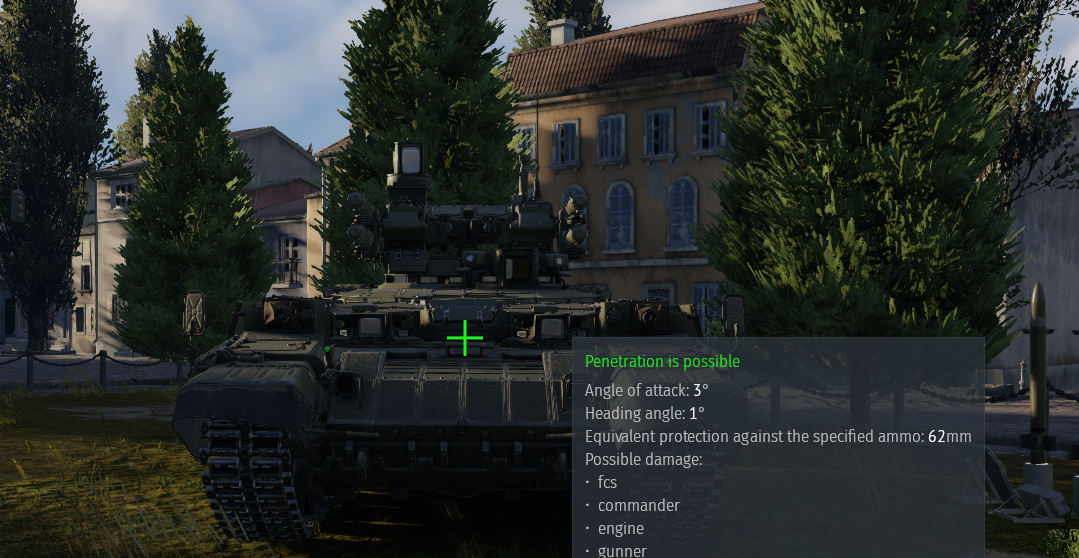
Rear-aspect you can shoot the hull and it should kill it. If you see it hulldown, frontally you can try shooting at the very bottom of the turret (right above the driver’s port) since it can even be penned by autocannons there, from the side, make sure you don’t hit the frontal composites and it should get the ammo, from the back you can also hit the ammo if you shoot the middle and it should get the ammo as well.
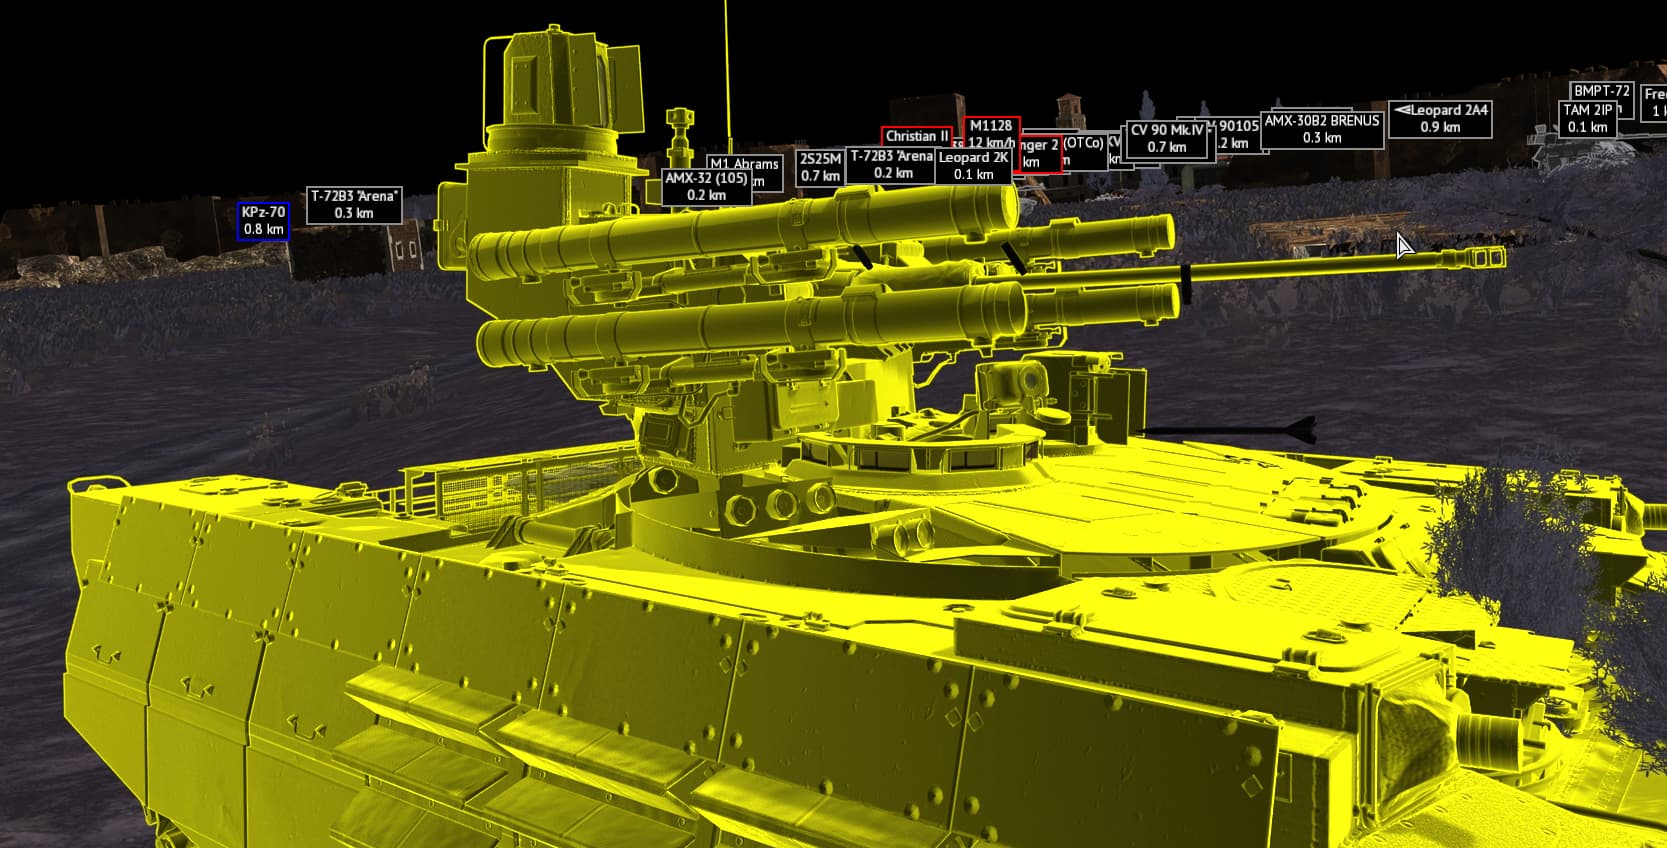
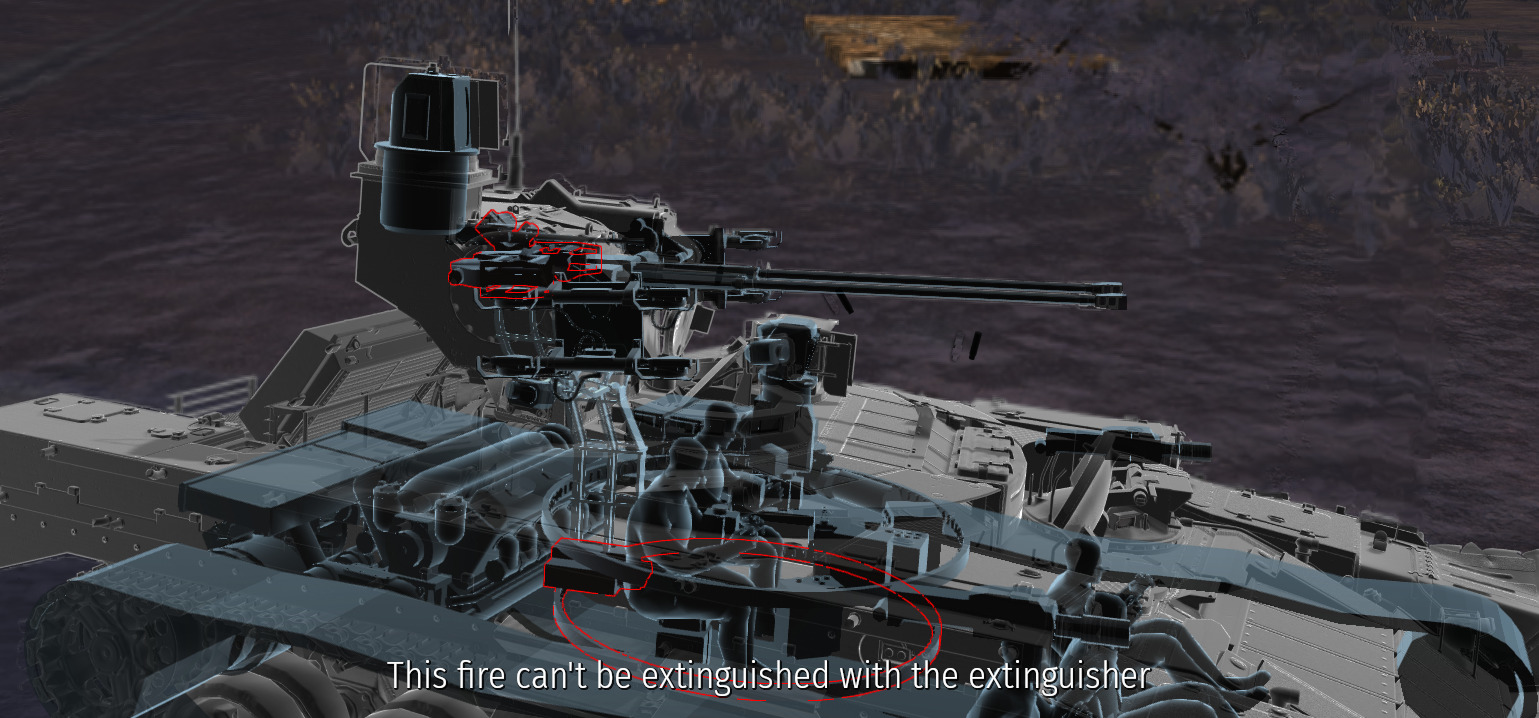
If your tank has HE (in general i mean, ik the merkava doesn’t), you can shoot the gun structure above the turret to get its ammo (which doesn’t kill it since gaijin sees it as external) and the vertical drive to disable it.
Also, place your shots more carefully since the shot in the video was, no offense, a skill issue.
Example screenshots of places to shoot are below (the protection analysis is somewhat broken since it doesn’t always list ammo under ‘possible damage’ even if the test fire does take it) (I used the 105mm DM63 shell):
I think the BMPT ammunition tank replenishment is the most perverted. It’s simply outrageous that the turret ammunition won’t be destroyed by human sacrifice. Either give the female tiger a positioning and reconnaissance function, and the ammunition will be ruined when burned out, or the turret ammunition can be destroyed by human sacrifice. What does it mean to have both benefits? I don’t expect both to change. It’s shameless to sell cars
This thing is overpowered to the point I don’t even play anything within or above it’s BR range anymore. If it’s still this way come next sale I won’t be buying any of the higher tier premium things I was thinking about either as there is no point-- it’s just that obnoxious.
More on topic, you can kill it from the front crew slot, or a few lucky angled shots on the chassis in very small places. However if the BMPT player is aware of this you can’t really do anything if you are an MBT-- you will fire one shot and die or be disabled too heavily before reload.
If you have a fast enough auto cannon you can disable it’s weapons and tracks if it’s VERY unaware and slow to react, and then pick it to death over the course of a couple minutes. However if they are able to aim their turret their firepower outclasses every other light tank in the game just about and you’ll die.
Many of those spots will not do significant enough damage to stop them from retaliation killing you with the exception of the front port one and the track area where it can chassis pen (sometimes).
The back, underplate, and sides never do anything meaningful like 90% of the time. The crew positions, lack of important modules, etc are why.
This would be fine if it were an MBT, but it’s not. You cannot shoot out it’s barrel, since all the other armaments can still fire fine, and if you do not kill it then it can just turn and kill you.
That’s because you shouldn’t aim for the crew in the first place, you aim for the ammo. If you look at the example pictures, every shot there hits the ammo and oneshots the bmpt. I play 11.3 with the otomatic and even that consistently oneshots bmpts as long as you aim for the ammo.
Also, you can shoot the ammo on top of the turret with heat and it will take out the ammo belt (that you hit) as well as spall enough to take the missiles and probably make one barrel red (not like it matters since the ammo burns down either way).
well. i found if they are not exposed just ignore them. play dead. if they dont see u they are not 2 dangerous XD. or teel them in all chat that u payng 5 ex wifes child support .mby they wil feel sad for u and spare ur life, idk. XD
It’s not about shooting the weakspot, it’s about understanding the layout of the tank, especially where the ammo is. And shooting the ammo is not something you have to think about, but rather get used to. It’s a skill that should come naturally and feel natural to do without having to think about it.
In general aiming for the ammo (if it’s not in a blowout panel***) has the highest chance of killing a tank; it’s a skill you ought to have if you want to play well. All russian/chinese mbt’s have ammo in the same place in the tank, you can quite literally play 9.3 and get used to aiming for the ammo, after which return to 11.3.
I’m telling you, it’s entirely possible to reliably oneshot bmpt’s even with a 57mm as long as you aim for the ammo. If you dont believe me, you can check my otomatic (which in itself is a god awful tank) k/d on statshark.
***you can still kill a tank if you shoot the ammo in a blowout panel as long as you destroy the blowout panel itself with the same shot (the red ‘wall’ in x-ray view)